We will dispatch the device containing course content within 72 Hrs of purchase. This DVD may be used to get started and continue with the course.
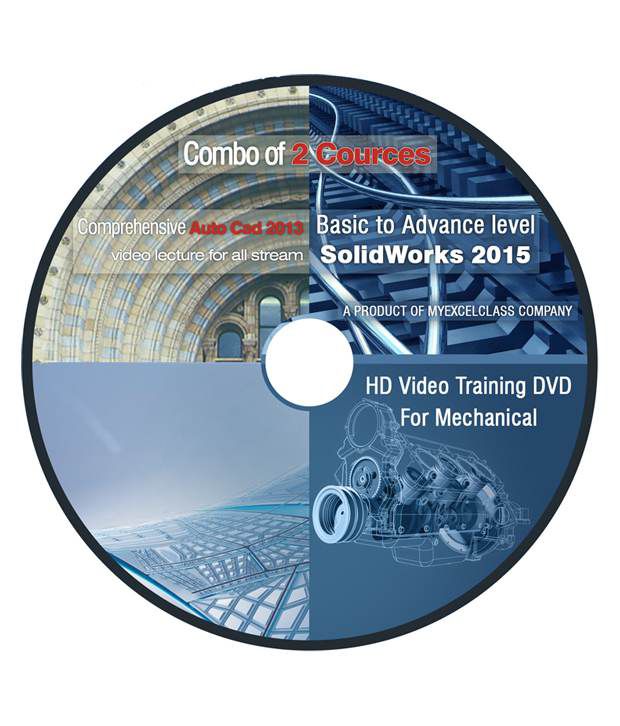
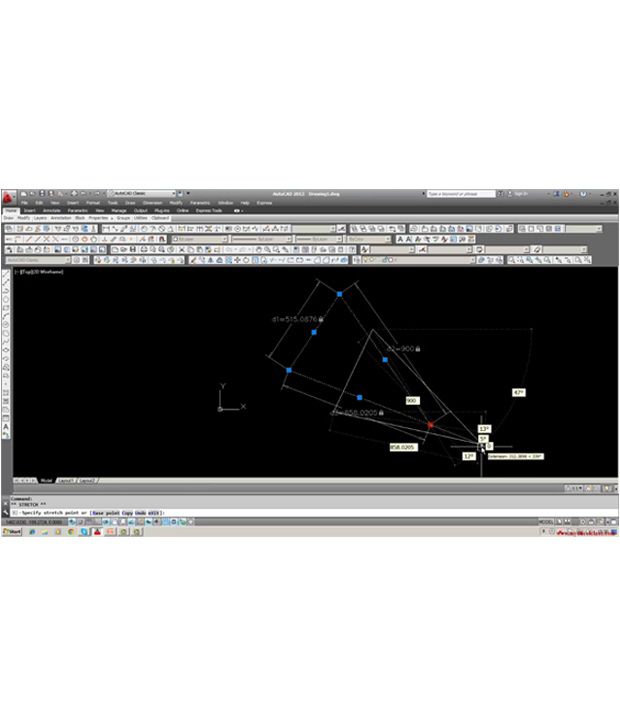
1. Comprehensive Auto Cad 2013 Description
Course Duration: 20 Hours +
What Is AutoCAD?
AutoCAD is a computer-aided drafting software program used for creating blueprints for buildings, bridges, machine parts and electrical circuits. This software is useful for architects, surveyors and engineers from all field. The six most common specialization areas where AutoCAD plays an important role are mechanical drafting, architectural drafting, civil drafting, electrical drafting, electronics drafting and aeronautical drafting.
1. How will our course help you?
2. How can you make your career after getting this course?
3. No matter you currently need this course or not.
4. No matter if you have not a good hold on theoretical knowledge of engineering principals.
5. What are we?
Question1. How will our course help you?
Answer- If you are an Engineer or Engineering student so your mostly work is depend upon engineering drawing for example: you are maniacal Engineer And your job profile has not design machine part in auto cad but make machine part as par drawing so you must know about reading drawing because if You know engineering drawing then you can create better machine part or you can find error easily and you can solve it yourself if it is a miner issue and if it is major one you should consult to related person to escape from Major loss.
Similarly if you are in the field of civil Engineering No matter what is your profile you can easily and better understand the design of project and creates the Best solution.
In the same if you are an electrical engineer so you can easily and better understand electrical circuit, wire fitting in the drawing and correct the error.
2. How can you make your career after getting this course?
Answer: After completing our course, your technical skills will be improved. You will find yourself more comfortable with your existing job. You interest will create in your job profile. As a result of that your boss will be impressed. You can get promotion and your reputation will be increased.
3. No matter you currently need this course or not.
Answer: We can understand that you don’t need this course write now as you are not a design engineer and having a good job. But when you switch to another company, they demand a good hold on engineering design software knowledge like auto cad. If you do not have learned from our course then what will happen?
May be they can reject you or they select you on a lower package than that you deserve or they can hire another one because he has all quality like you and with that he knows engineering design software knowledge . If you need that job urgently, you cannot do this at that time. If you do this course now you will gain enough experience from it.
If a creation or invention or a new technological machine design comes in your mind you can draw it with the help of auto cad. You can present it to your project manager or investor to work on it.
5. What are we?
Answer: Our trainer is a teacher as well as an auto cad designer. As he has more than 25 year industrial experience in auto cad. It is not introductory course but it does not mean that a person who doesn’t know anything cannot learn from it. It is comprehensive course. It means the trainer will cover everything from scratch.
In it the course will three levels: 1.Introductory 2.Intermidiate 3.Advance.He shares his deep knowledge in these videos. His emphasis is on that knowledge which is required to complete real life project. On the basis of his practical experience, he told that learner can draw same design from various methods.as well as he emphasis on the specific command is most appropriate for the accuracy of design because it’s a engineering design not only a simple drawing.
Auto Cad learning objectives
Lesson -1
• History & Overview
• Release in Use
• Installation requirement
• Invoke Auto program
• - Desk top/start menu
• Open & save drawing sheet – AutoCAD File menu/ standard tool bar / File Drop down menu
• Drawing Aids Brief -
• AutoCAD menus – Tool bars / drop down menus
• Auto Cad Tools Use of ZOOM, EXTENT, ERASE commends – ZOOM tool bar / View Drop down menu
• Grid setting
• Cursor setting & pick box setting
Lesson -02
• Drawing lines using options Preliminary to get acquainted. (Draw tool bar & Draw Menu)
• Draw perpendicular to a line, joining lines (Object Snap tool bar)
• Understand different Co-Ordinate System (Ortho Mode, F9 & Polar tracking F10)
• Use of Short cuts Application
• Drawing Circle (Draw tool bar & Draw Menu)
Lesson -03
• Drawing Arc of Circle (Draw Menu, Draw tool bar)
• Drawing rectangle, Polygon (Draw menu & Draw tool bar)
• Drawing plane figures (Draw menu & Draw tool bar)
• Drawing Ellipse tool bar)
• (Draw menu & Draw
• Drawing curved lines (Draw tool bar, Draw menu)
Lesson -04
• Drawing Tangent to circles
• (Draw tool bar, Draw menu)
• Saving the drawing, Save, Save as (Standard tool bar & File menu)
• More about Object snap Setting
• Donought
• List Command
• Trim
• Polyline
Lesson -05(Layers)
• Brief description of drawing in layer & its uses
• (Tool bars Layer & Layer II)
• Setting layers. (Tool bars Layer & Layer II)
• Layers properties (Tool bars Layer & Layer II)
• Point (Tool bar Draw & Drop down menu Draw)
• Dividing a line (Tool bar Draw & Drop down menu Draw)
Lesson 06 (Editing Commands)
• Copy
• Move
• Cut
• Rotate
• Fillet
• Chamfer
• Mirror
• Paste
(Tool Bar Modify & Drop down menu Modify)
Lesson 07 Editing Continued L-07
• Grip
• Lengthen
• Extend
• Break
(Tool Bar Modify & Drop down menu Modify)
Lesson – 08 (Creating Texts & Editing)
• ARRAY CLASSIC
• Rectangular, Polar
• ARRAY
• Under ARRAY - 1) Rectangular 2) Polar & 3) Curve
• Associativity (0- independent) & (1- Object)
• Edit Array (Tool bars Modify & Modify II)
Lesson – 09
• Scale – Increasing size of object.
• Text Editing
• Format & Fonts
• Scale Factor
• TEXT Command
• MTEXT Command- (Tool bars Text & Format & Menu Format)
Lesson – 10 (Dimensioning) (Video L-10 & 10.1)
• Dim commands
• Dim Hor
• Dim Ver
• Dim Align
• Dim Angular
• Dim Leader
• Dimension properties change - (Tool bar dimension & Menu dimension)
Lesson -11 (Copy clip & Paste) (Video L-11 & 11.1)
• Copy Clip
• Paste, Paste Special
• As Block
• Insert pictures
• Hatching
• Region
• Table Creation
• (Draw menu & Tool bar modify)
Lesson -12 (Geometric Dimensioning & Tolerance, GD&T)
• Dim Tol
• DimTm
• DimTp
• Dimensioning Characteristics & Symbols (Tool bar dimension & Menu Dimension)
Lesson -13 Block Attributes L-13 & 13.1
• Blocks creation
• Block properties
• Block Insert
• Block Insert properties
• Wblock creation
• Wblock properties
• Wblock Insert & properties
• Edit Block
• Concept of Dynamic Block
• Pedit Command (Tool bars Insert, Draw Modify II, Standard)
Lesson-14 Parametric Drafting(L-14, L14.1, L-14.2 & L-14.3)
• Over view
• Constraints
• Geometrical Constraints
• Dimensional Constraints
• Auto Constraints
• Constraints Setting
• Create & Edit Parametric Drawings
• (Drop down menu Parametric)
Lesson-15 (Isometric drawing)
• Definition
• Purpose of Isometric drawing
• Creating Isometric plane
• Sample drawing creation
• Iso circle
• Dimensioning
• Text edit on Isometric drawing
(Command snap, Menu dimension, Tool bar Draw)
Lesson–16 Attributes (Video16,16.1&16.2)
• What is Attributes
• Defining Attributes (ATTDEF)
• Editing Attribute Tags
• Inserting Blocks with Attributes
• Extracting Attributes (DDATTXT)
• Attribute visibility
• Applications
(Drop down Menu Draw, Tool bar Standard)
Lesson – 16 (Continued)
• Block Attribute Manage
• Data Extraction
• Example-Bill of material (Modify-Object)
Lesson -17 External Reference (Video L-17 & L-17.1)
• Understanding & application (Tool Bar Reference & Insert)
• Key Terms:-
• Xref
• Attach
• Reload
• Detach
• Unload
• XBind
• Overlay
• Underlay
• Frame
• Clip
Lesson – 18 (A few Commands)
• Measure: - Distance, Angle, Area, Radius
• Purge
• LT Scale
• Xplode
• Scale
• Pedit
(Tool bar Measurement tools)
Lesson -19 Plotting (Video L-19 & 19.1)
• Model space
• Paper Space
• Zoom
• Selecting the scale
• Sheet size selection
• Print PDF / PNG File
• Print to Plotter
• Creating Drawing template
• (Menu File, Tool bar View ports & Command line)
Lesson-20 Annotative Objects
• Text
• Mtext
• Dimension
• Leaders
• Hatches
• Attributes
(Menu Dimension, Styles & Standard Annotation, Status bar Annotation Scale)
Lesson -21 (Video L-21)(Custom Menus)
• Menu load
• Brief description
• Create menu – brief description
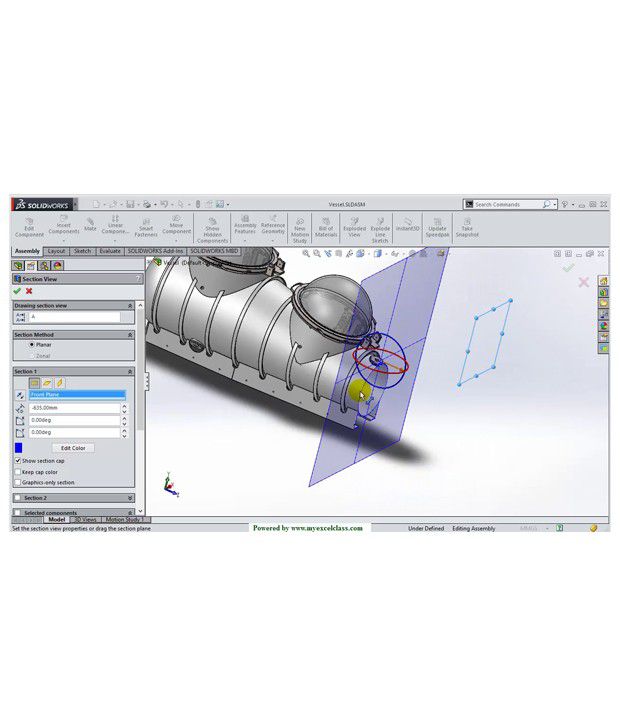
2. Basic to Advance level SolidWorks 2015 Description
Course Duration: 20 Hours +
1. How will our course help you?
2. How can you make your career after getting this course?
3. No matter you currently need this course or not.
4. No matter if you have not a good hold on theoretical knowledge of engineering principals.
5. What are we?
Question1. How will our course help you?
Answer- If you are an Engineer or Engineering student so your mostly work is depend upon engineering drawing for example: you are maniacal Engineer And your job profile has not design machine part in Solidworks 2015 but make machine part as par drawing so you must know about reading drawing because if You know engineering drawing then you can create better machine part or you can find error easily and you can solve it yourself if it is a miner issue and if it is major one you should consult to related person to escape from Major loss.
In the same if you are an electrical engineer so you can easily and better understand electrical circuit, wire fitting in the drawing and correct the error.
2. How can you make your career after getting this course?
Answer: After completing our course, your technical skills will be improved. You will find yourself more comfortable with your existing job. You interest will create in your job profile. As a result of that your boss will be impressed. You can get promotion and your reputation will be increased.
3. No matter you currently need this course or not.
Answer: We can understand that you don’t need this course write now as you are not a design engineer and having a good job. But when you switch to another company, they demand a good hold on engineering design software knowledge like Solidworks 2015. If you do not have learned from our course then what will happen?
May be they can reject you or they select you on a lower package than that you deserve or they can hire another one because he has all quality like you and with that he knows engineering design software knowledge . If you need that job urgently, you cannot do this at that time. If you do this course now you will gain enough experience from it.
If a creation or invention or a new technological machine design comes in your mind you can draw it with the help of Solidworks 2015. You can present it to your project manager or investor to work on it.
5. What are we?
Answer: Our trainer is a teacher as well as a Solidworks 2015 designer. As he has more than 10 year industrial experience in Solidworks 2015. It is not introductory course but it does not mean that a person who doesn’t know anything cannot learn from it. It is comprehensive course. It means the trainer will cover everything from scratch. In it the course will three levels: 1.Introductory 2.Intermidiate 3.Advance.He shares his deep knowledge in these videos.
His emphasis is on that knowledge which is required to complete real life project. On the basis of his practical experience, he told that learner can draw same design from various methods.as well as he emphasis on the specific command is most appropriate for the accuracy of design because it’s a engineering design not only a simple drawing.
A Powerful 3D design solution for rapid creation of parts, assemblies and 2D drawings with minimal training.
Every one of us has certain design requirements that we want to accomplish. In the whole life of a Design Engineer, there are certain areas that he works in full expertise. But rest of the features in a CAD solution die useless for him. He even wants to put a glance on them all his life. So if the software is too complex, the Design Engineer will feel more troubled with those useless features which He is not going to use. They work like road blocks at times in his life without him getting a cue of what to do with it.
Now here is the real dilemma with a CAD solution:-
1. It needs to be specific to a particular user and should not offer more than what he actually needs.
2. But in the meantime, it should be usable by all the designer community. It can’t be customized solution for each individual due to very high incurring costs.
Why to use SolidWorks 2015?
So here is the solution: - SolidWorks 2015
It has rich and complex functionalities and design capabilities that one can use with a simple and dynamic interface. You can pick up desired functionalities at your active interface and hide useless ones from the active interface. The rules of this ‘Game’ fairly simple and comprehensive. You can easily learn them and work out any design of your choice with use of your mind.
What we can do with SolidWorks
-
We can make up new parts, assemble them and then create drawings for the parts or the assemblies.
-
Further we can assign material to a part and get its mass-volume properties.
-
We can test a part or an assembly of moderate complexity under various loading conditions. We can analyze how much the part will bend under what force, how much force it will bear and hence optimize our design for least material required for any specific loading requirement
-
We can see how the fluid flows through a part or an assembly of part using SolidWorks FloXpress.
-
Other than this, we can analyze the stress behavior of a critical part in motion, calculate various dynamic functions of a part in motion.
-
You can create models of Printed Circuit Boards (PCB) using CircuitWorks which function like a real circuit.
-
You can use SolidWorks Costing to work out the cost of production by specifying the costs of materials used and processes applied.
-
Using SolidWorks Design Checker, you can check dimensioning standards, fonts, materials, sketches and other design elements as against the specified design criteria.
-
You can verify whether can part can be manufactured or not using DFMXpress.
-
A path of pipes, tubes or electrical cables can be built between components using SolidWorks Routing.
There are many more to explore in SolidWorks.
Why choose for our Video Series?
We cover every possible design element of SolidWorks that is going to be of your use.
In each of our video, we do not put up only the selected parts of the tutorial video. We show you from start to finish giving you the intricate details and showing you how it goes in real life. Any function failure is seen in many of the videos which give you a good idea of what to do and what not to do.
In every video, we start from zero so that you are not hung at any stage of designing without having a clue of getting out of it. Following our video tutorials, you can very easily learn the parts.
We show you the designing of products that are actually accomplished in the design industry. Things are practical, not theoretical. You know what the difference between theoretical and practical one is.
After complete this course you will able to do all this.
SolidWorks 2015 Module 1 (Various Sketch Entities)
01 Part Sketch 2D Line
02 Part Sketch 2D Circle Polygon
03 Part Sketch 2D Rectangle Fillet Champher
04 Part Sketch 2D Spline Slot Arc Ellipse
05 Part Sketch 2D Text Point
06 Part Sketch 2D Trim
07 Part Sketch 2D Offset Mirror Pattern Move Copy Rotate Scale Stretch
08 Part Sketch 2D Rapid Sketch
09 Part Sketch 3D Plane Convert Intersection
10 Part Sketch Zoom
11 Part Sketch Keyboard Shortcut Relation
12 Part Sketch More Keyboard Shortcuts
13 Part Sketch Importing an Image
14 Part Sketch View
15 Part Sketch Importing an Image
16 Part Sketch Block
17 Part Sketch Smart Dimension
18 Part Sketch Belt Chain
19 Part Sketch Replace Entity
20 Part Sketch Giving Color, Thickness and Style to a Sketch Entity
SolidWorks 2015 Module 2 (Various Feature Entities)
21 Part Feature Extrude 1
22 Part Feature Extrude 2
23 Part Feature Saving in many file formats
24 Part Feature Revolve
25 Part Feature Extruded Cut Fillet
26 Part Feature Revolved Cut
27 Part Feature Section View
28 Part Feature Loft
29 Part Feature Sweep
30 Part Feature Lofted Cut
31 Part Feature Swept Cut 1
32 Part Feature Swept Cut 2
33 Part Feature Boundary Boss
34 Part Feature Boundary Cut
35 Part Feature Linear Circular Pattern
36 Part Feature Rib
37 Part Feature Draft
38 Part Feature Shell
39 Part Feature Wrap
40 Part Feature Mirror
41 Part Feature Helix Spring Thread Unified Inch
42 Part Feature Instant 3D Rebuild
43 Part Feature Surface Extrude Intersect
44 Part Feature Surface Revolve
45 Part Feature Surface Sweep
46 Part Feature Loft and Trim Surface
47 Part Feature Boundary Surface
48 Part Feature Surface Freeform
49 Part Feature Filled Surface
50 Part Feature Ruled Surface
51 Part Feature Surface Planar Offset Flatten Fillet Delete Replace Extend
52 Part Feature Surface Untrim Knit Thicken Thickened Cut Cut with Surface
53 Part Feature Curve Project Curve Composite Curve and Curve thru Reference points
54 Part Feature Gear Involute
55 Gear Spur Using Equation in Smart Dimension
56 Part Feature Gear Rack and Pinion
57 Part Feature Gear Helical Herringbone
58 Part Feature Gear Rack with Helical Pinion
59 Part Feature Gear Worm and Worm Wheel
60 Part Feature Reorder a Feature
61 Part Feature Scale
62 Part Feature Insert Part Move or Copy Body Indent
63 Part Feature Deform Point
64 Part Feature Deform Curve to Curve
65 Part Feature Deform Surface Push
66 Part Feature Flex Bend Twist Taper Stretch
67 Part Feature Combine Bodies Split Body Delete Body
SolidWorks 2015 Module 3 (Assembly)
68 Assembly Insert Remove Move or Rotate a Part Standard Mate
69 Assembly Typical Problems when mating
70 Assembly How to make and mate a Cam
71 Assembly Slot Mate
72 Assembly Hinge Mate
73 Assembly Gear Mate
74 Assembly Rack Pinion Mate
75 Assembly Screw Mate
76 Assembly Universal Joint Mate
SolidWorks 2015 Module 4 (Drawing)
77 Drawing Dimension, Text, Views, Scale and Sheet Format
78 Drawing Various Views Standard 3-Projected-Section-Detail-Broken-out-Break
To get more information, you may want to watch the video below
Learn Everything, Anywhere, Anytime
India's Largest Online Education Marketplace